Often when I’m debugging builds or releases on VSTS, I will see that it uses the vstest.console.exe command line for running tests. Sometimes I need to run vstest.console.exe locally so that I can debug test run failures.
FYI, it is installed as part of Visual Studio 2017, and if you run the Visual Studio Developer Command prompt you will be able to run it from there. The executable lives in C:\Program Files (x86)\Microsoft Visual Studio\2017\Enterprise\Common7\IDE\CommonExtensions\Microsoft\TestWindow
If you don’t have VS2017 installed and you need to download it so that you can run it locally, you can find it in the Microsoft.TestPlatform NuGet package.
Once you’ve downloaded the NuGet package, rename it from microsoft.testplatform.15.8.0.nupkg to microsoft.testplatform.15.8.0.zip. Then open it, and you’ll find vstest.console.exe in the tools\net451\Common7\IDE\Extensions\TestPlatform folder.
Before starting I assume you’ve already got OAuth2 setup correctly on your application (using bearer tokens), and you have decorated your controllers and actions with [Authorize] attributes. If you haven’t, that is beyond the scope of this blog post. Here all I’m doing is explaining how to configure Swashbuckle.
First, you need to tell Swashbuckle what security your API has:
services.AddSwaggerGen(c =>
{
    c.AddSecurityDefinition("bearerAuth", new OpenApiSecurityScheme
    {
        Type = SecuritySchemeType.Http,
        Scheme = "bearer",
        BearerFormat = "JWT",
        Description = "JWT Authorization header using the Bearer scheme."
    });
This adds a securityDefinition to the bottom of the Swagger document, which Swagger-UI renders at the top as an “Authorize” button:
Clicking that brings up a dialog box where you can put your bearer token:
The next thing we need to do is tell Swashbuckle which of our actions require Authorization.
If all of your endpoints have authentication, then you can use Swashbuckle’s AddSecurityRequirement:
services.AddSwaggerGen(c =>
{
    c.AddSecurityDefinition("bearerAuth", new OpenApiSecurityScheme
    {
        Type = SecuritySchemeType.Http,
        Scheme = "bearer",
        BearerFormat = "JWT",
        Description = "JWT Authorization header using the Bearer scheme."
    });

    c.AddSecurityRequirement(new OpenApiSecurityRequirement
    {
        {
            new OpenApiSecurityScheme
            {
                Reference = new OpenApiReference
                {
                    Type = ReferenceType.SecurityScheme,
                    Id = "bearerAuth"
                }
            },
            new string[] {}
        }
    });
If however, some of your endpoints allow Anonymous access then you can use the SecurityRequirementsOperationFilter:
You can either download the SecurityRequirementsOperationFilter from here, or, if you’re using ASP.NET Core you can install my Swashbuckle.AspNetCore.Filters package from NuGet, which includes it (and other filters).
The SecurityRequirementsOperationFilter adds a security property to each operation in the Swagger document, which renders in Swagger-UI as a padlock next to the operations which require authentication:
Once you’ve done that, when you “Try it out” using the Swagger-UI, the authorization header with your bearer token should be sent to your API.
Another handy extension to Swashbuckle which I have written displays which endpoints have Authorization, and which policies, roles, or users have access to that endpoint.
Swashbuckle allows you to include XML comments on your API’s Swagger page. To do this you need to set your Build to output an XML file, which Swashbuckle reads the XML comments from.
Don’t forget to add that XML file to the “Release” build configuration too, otherwise you won’t have XML comments when your application is actually deployed to an environment.
Here’s a handy code snippet for your .NET Core .csproj file:
Additionally, if your application is deployed on Azure Service Fabric, you will also need to copy the XML file to your PublishDir, with the following snippet in your .csproj:
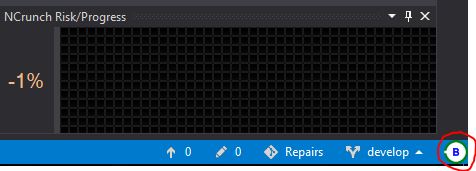
NCrunch is a great unit test runner and has been part of my developer toolbox for many years.
Recently I was having an issue on a medium-sized project where the NCrunch’s Build step was taking almost 2 minutes to complete. That spinning “B” was taking forever!
The tests themselves would run in under one minute.
The problem was we use a custom Autofixture [AutoData] attribute on every test.
[Scenario]
[WebHostAutoData]
public void CreateJob_ShouldCreateSuccessfully(
    WebApiClientFixture apiFixture
As it turns out, NCrunch enumerates all test attributes during Analysis, so you should not have any expensive code in your attribute’s constructor.
In my case, I fixed this by introducing a base class for all of my tests, which creates the TestServer (during test run). I then dropped our custom [AutoData] attribute.
If you’re using an IFormFile in your ASP.NET Web Api like so:
[HttpPost("upload")]
public IActionResult UploadFile(IFormFile file)
{
N.B. Update December 2018. As of Swashbuckle 4.0, IFormFile is supported out of the box, so the filter below is no longer needed.
If you do this, the Swagger page as rendered by Swashbuckle won’t look correct:
However, if you install version 2.5.0 or later of my Swashbuckle.AspNetCore.Examples NuGet package, then you can add the [AddSwaggerFileUploadButton] attribute to your controller action, like so:
[HttpPost("upload")]
[AddSwaggerFileUploadButton]
public IActionResult UploadFile(IFormFile file)
{
As microservices architectures become more popular, so increases usage of NuGet as a way of sharing code amongst separate services. The last few projects I’ve worked on have typically contained a number of “Core” NuGet packages with shared code and interfaces that are consumed by one or more services in the solution. Our build pipeline will publish these NuGet packages to an in-house NuGet server.
This can cause a lot of developer friction when you’re working in one of the services and you decide you need to change one of the Core projects. Typically you’ll
make the change to Core
commit it
(Perhaps raise a PR and wait for approval)
wait for the build to publish new versions of the package
and finally updated the package in your service.
Probably at least 20 min wait for all that to happen. And then you realise that your change didn’t quite work, so you have to go through the cycle again with another change.
Well, here’s a shortcut to that cycle and it’s pretty darn simple. Note that this only works if you’re using the newer .NET Core style .csproj containing <PackageReference>. Simply
make the change in Core and compile it locally
Copy the resulting dll(s) to your local NuGet packages feed folder. NOT the bin folder of your service, or the packages folder of your service. On my machine the local NuGet packages feed folder is C:\Users\matt\.nuget\packages\.
As soon as the dll is copied, Visual Studio detects the change – you don’t need to tell it to update the NuGet packages or even compile!
Another surprise bonus of this – while debugging you can step into the Core code! You don’t need to mess around copying PDBs around or anything. I don’t know how it works, but Visual Studio seems to somehow know that the DLL you’ve copied into the NuGet folder came from your local machine and thus it knows where the source code for it is.
Obviously once you’re happy that your changes to Core are working correctly, then you can can commit them and consume an updated version of the package in your service as usual.
Anyway, hopefully this will speed up your local development as much as it has mine.
So you’re working on a Service Fabric application which has an ASP.NET Web api host project. I find the debugging experience painful, for two reasons:
Time to start debugging the project is a minimum of 45 seconds, every time, because the app gets deployed to a local service fabric cluster which takes forever.
You need to remember to run Visual Studio as administrator in order for the above local deployment to succeed.
If either of these things bug you, then here’s a possible solution. Once we’re done you’ll be able to set the Web project in your solution as the StartUp project instead of the Service Fabric application, for much faster debugging, and you’ll no longer need to run VS as admin.
First, change the Program.cs in the Web project:
private static void Main()
{
	if (UseServiceFabric())
	{
		StartServiceFabric();
	}
	else
	{
		StartWebHost();
	}
}

private static bool UseServiceFabric()
{
	var webHostBuilder = new WebHostBuilder();
	var environment = webHostBuilder.GetSetting("environment");

	return environment != "Development";
}

private static void StartWebHost()
{
	var builder = new WebHostBuilder()
		.UseKestrel()
		.UseContentRoot(Directory.GetCurrentDirectory())
		.UseStartup<Startup>();

	var host = builder.Build();
	host.Run();
}

private static void StartServiceFabric()
{
	try
	{
		// The ServiceManifest.XML file defines one or more service type names.
		// Registering a service maps a service type name to a .NET type.
		// When Service Fabric creates an instance of this service type,
		// an instance of the class is created in this host process.

		ServiceRuntime.RegisterServiceAsync("Web1Type",
			context => new WebHost(context)).GetAwaiter().GetResult();

		ServiceEventSource.Current.ServiceTypeRegistered(Process.GetCurrentProcess().Id, typeof(Web1).Name);

		// Prevents this host process from terminating so services keeps running.
		Thread.Sleep(Timeout.Infinite);
	}
	catch (Exception e)
	{
		ServiceEventSource.Current.ServiceHostInitializationFailed(e.ToString());
		throw;
	}
}
If the ASPNETCORE_ENVIRONMENT setting is Development, then it won’t use Service Fabric at all and will just use a plain ol’ ASP.NET Core WebHostBuilder to start the web host.
You’ll also need to change your Debug target to be the Web project, instead of IISExpress, via the VS Standard toolbar.
And just like that the app startup time has shrunk from around 40 seconds to around 5 seconds. Or from an unbearable 100 seconds for the application the team I just joined is working on.
Out of the box there’s no way to add an Authorization header to your API requests from swagger-ui. Fortunately (if you’re using ASP.NET), Swashbuckle 5.0 is extendable, so it’s very easy to add a new IOperationFilter to do it for us:
public class AddAuthorizationHeaderParameterOperationFilter : IOperationFilter
{
    public void Apply(Operation operation, SchemaRegistry schemaRegistry, ApiDescription apiDescription)
    {
        if (operation.parameters != null)
        {
            operation.parameters.Add(new Parameter
            {
                name = "Authorization",
                @in = "header",
                description = "access token",
                required = false,
                type = "string"
            });
        }
    }
}
Now all you need to do is register it in your EnableSwagger call:
Once that’s done it’ll give you an input field where you can paste your Authorization header. Don’t forget to add the word “bearer” if you’re using a JWT token:
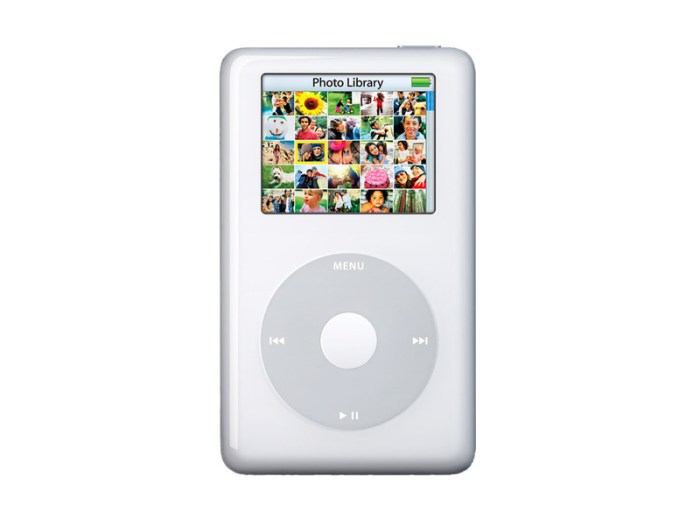
Back in the 90s hardly anyone used Macs or Apple products. They had a small foothold in schools and graphic design shops but that was about it. The iPod was the beginning of their post-millenium rise – the 3rd generation iPod released in 2003 was the first Apple hardware I’d ever wanted, and I eventually purchased a 4th gen iPod in 2004.
The fourth generation iPod “photo” model
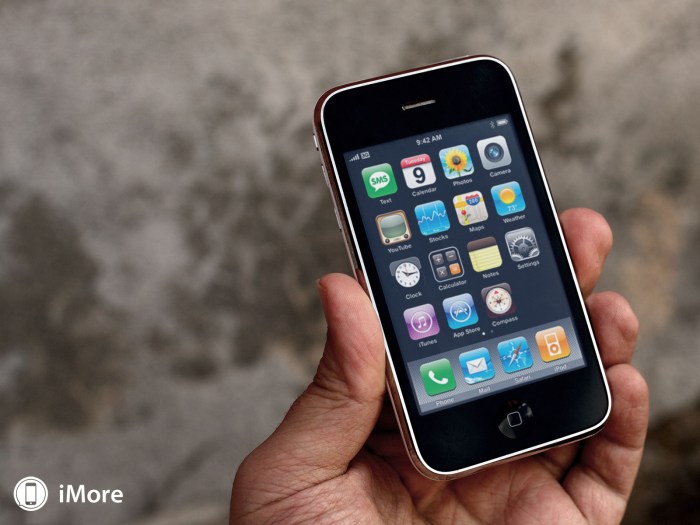
A few years later in 2007 the iPhone came out and completely changed what a smartphone was. Prior the the iPhone the best smartphone was probably a Blackberry, with it’s clunky little keyboard and tiny screen. But the iPhone with it’s giant glass screen and intuitive gestures was revolutionary.
The iPhone 3GS (2009), the first iPhone I owned
There’s hardly any products I can think of that I could afford to purchase the best in the world of. Take cars for example. I can’t afford a brand new Ferrari. Or TVs – I couldn’t afford (or couldn’t justify buying) a top of the line whizz-bang TV. But a phone – yes! The iPhone at the time was the best phone any money could buy. Not that I gave a shit about having an awesome phone, all I wanted at the time was to have wikipedia in my pocket so that I could be a know-all at parties.
Both the iPod and later the iPhone made people, especially us geeks, open our eyes to how good Apple’s products could be. The Macbook Air made us realise that the lightest and sexiest laptop/notebook was also made by Apple. Apple started shipping with Intel processors! Within a couple of years Apple laptops were everywhere, even at conferences for us Windows developers.
I never considered myself an Apple fanboy, but here I am in 2017 typing this on my trusty Macbook Air, with my aging iPhone 5 alongside, and an iPad sitting on the windowsill (which I still never use). At the time of each purchase it wasn’t that I wanted to buy an Apple product, it was just that I wanted the best laptop/phone/tablet on the market at the time, and each of those happened to be made by Apple.
Amongst my geeky friends it was pretty much the same pattern. Mac laptops and iPhones for the most part. Not all though – some swore by Android phones.
In the last couple of years though, Apple have made a few key mistakes with their products which have seen my geek friends desert them, and I think it won’t be long before I too leave Apple products behind.
iWatch sucked
The first big Apple let down was the Apple Watch. Rumours had abounded for years that Apple would be bringing out a smartwatch that would change the world, just like the iPhone did. I was excited about it. Then when it was finally released, it was expensive and gimmicky. Hardly any of my geek friends bought one (hi Andy J, Alan, Alex).
No headphone port
Yep, another mistake was omitting the headphone port from the iPhone 7. Not a single iPhone buyer thought that was a good idea or a step forward. That small error was enough for us geeks to doubt that Apple knew what they were doing, and look at Android phones.
Downgrading the Macbook Pro
The killer mistake though was 2016’s Macbook Pro
More expensive
No USB 3.0 ports
No HDMI port
No SD card reader
No magsafe power
Similar spec CPU, memory and storage to the 2015 model
Lame touch bar
Although most users don’t use the F1-F12 keys on the top row of a QWERTY keyboard, us developers DO use them, so getting rid of those keys was a big deal.
In summary, Apple haven’t released anything amazing since Steve Jobs died.
So what’s a geek to buy in 2017 then? I don’t know – it’s not as straightforward as a couple of years ago. I usually go on my geek friends recommendations – on the phone front, Google Pixel phones are well regarded. iPhones are hanging on by their fingernails.
On the laptop front, NONE of my friends are buying new Macbooks. Microsoft(!) Surface Books or Surface Pros are looking like a good option. Windows laptops are making a comeback.
What now for Apple
For now, they’ve lost the geek crowd, and in technology where the geeks lead the world follows. Apple needs to release a new killer product to get us back. Or just drop the prices on their bloody phones and make a decent laptop again!
They have enough $$$ in the bank that they’re not gonna die any time soon, but until they win the geek crowd back I predict shrinking profits, maybe even losses, and a dropping share price for Apple (currently USD$132).