Fun with a Raspberry Pi Zero 2

A few years ago I setup Pi-Hole on a Raspberry Pi 3B+. Recently we went away on holiday for a month, and I powered it down before we left. When we came back and I switched everything back on, it worked for a couple of hours but then something popped and it stopped working (along with my Asus RT-AC86U router). It’s now dead, and doesn’t boot (the router is dead too).

For a replacement I picked up a (headless) Raspberry Pi Zero 2. The existing power supply and SD card from the dead 3B+ still worked.

Raspberry Pi Zero case
A Raspberry Pi Zero in a case

Over the last couple of weeks I’ve been finding more and more uses for it. One thing that’s awesome about the Pi is the amount of help and guides available to do anything with it. Here’s some things I’m now doing with mine, to give you some ideas.

Pi-Hole

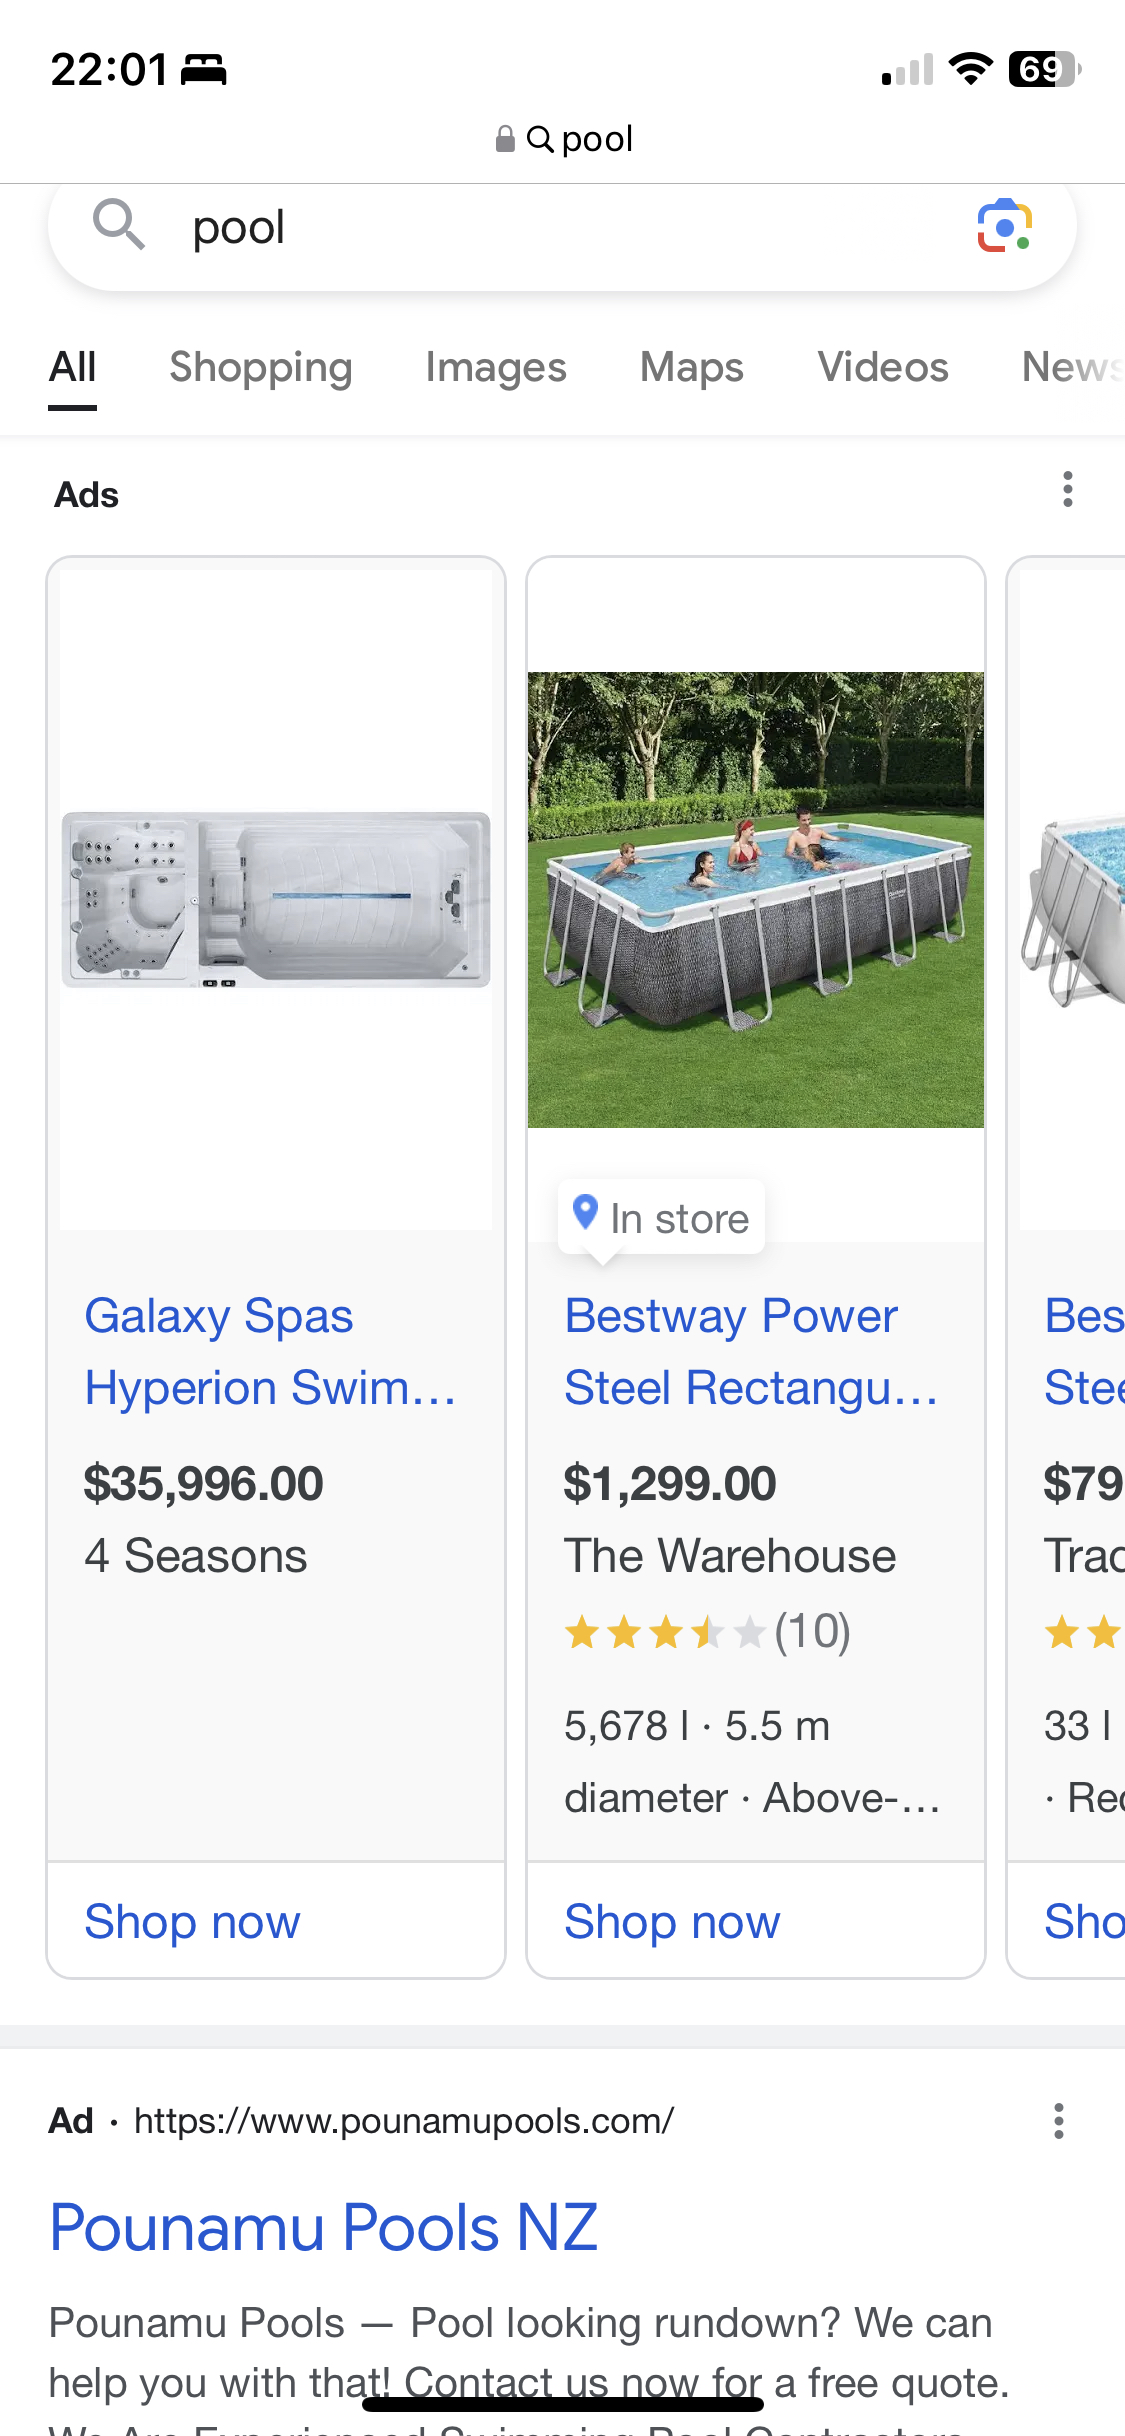
If I’m honest, I don’t know if I need Pi-Hole (a network-wide ad blocker) these days. My browser and phone have ad blockers. And it gets in the way fairly often – e.g. if I search for a product on my phone, the first results in google get blocked, and to get those links to work I have to whitelist a handful of domains, which feels like it’s negating the point of it, so I don’t whitelist. It also gets in the way on some of my LG TV’s apps.

Phone screenshot of google search results   phone screenshot of a blank page

I do enjoy Pi Hole’s dashboard though, especially the “Percentage blocked” graph:
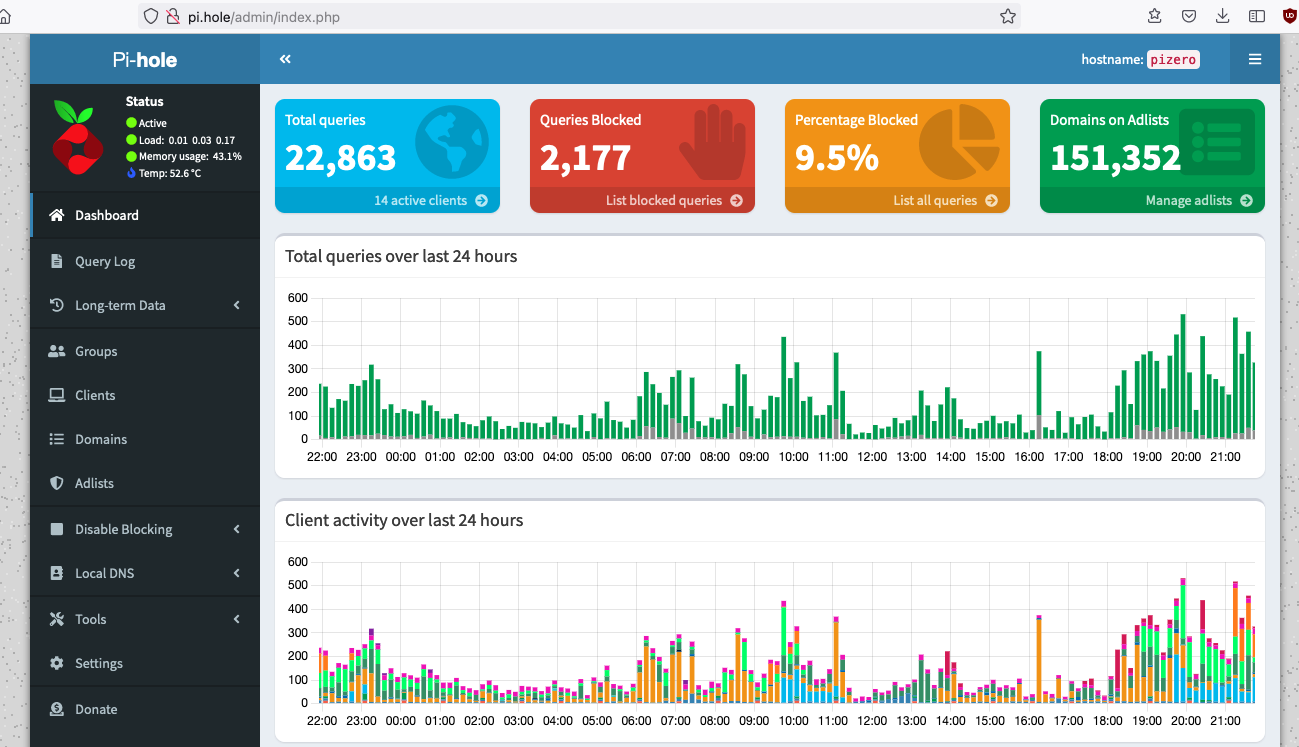
UPnP / DLNA server

As I mentioned above, my ASUS RT-AC86U router also crapped out at the same time. This was annoying because when I bought it about 4 years ago it was a top of the line $450 router. I had a 4Tb USB HDD plugged into it’s USB 3.0 port, and the router came with Time Machine software to backup my Mac, and a DLNA server, which was handy for viewing photos and videos on our LG TV in the lounge, via the TV’s built in “Photos and Videos” app.

About a year ago I added a cheaper ASUS RT-AX53U router to our network and set that up as a node in a mesh network using ASUS’s AI Mesh, so that we would have stronger WiFi in our bedroom at the other end of the house.

I didn’t feel like spending $400 again to replace the broken router, given the first one didn’t last long enough, so as a temporary measure I made the cheaper AX53U router the primary router, and then I later bought another AX53U router and set that up as an AI Mesh node for our bedroom.

However, I didn’t realise the cheaper AX53U is missing some of these USB features – i.e. no Time Machine. And although it supports DLNA (UPnP server in the screenshot below), I found it to be buggy, and I couldn’t get it to work.

Screenshot of ASUS router config page, showing USB applications

It was pretty easy to set up my Pi Zero to be a DLNA server, following the instructions over here. One gotcha is that the Pi Zero doesn’t have standard USB ports, so I had to first buy a $4 Micro USB to USB A OTG adapter so that I could plug in my USB HDD to the Pi.

Once setup and running, you get this basic UI:

Screenshot of MiniDLNA status page

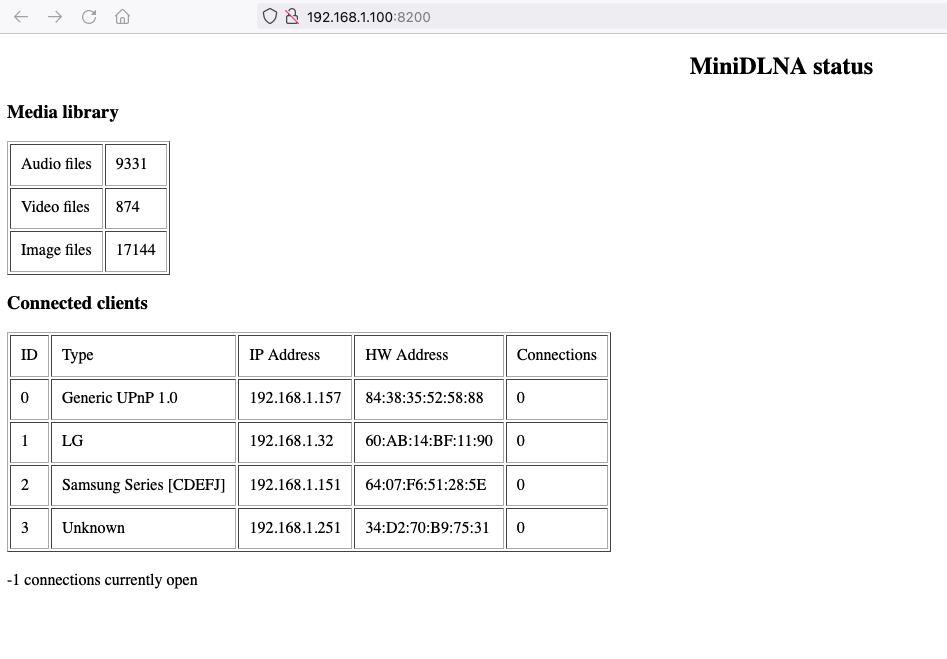
Pro tip: you can browse a DLNA server using VLC (e.g. on your phone) if you want to check it’s running.

(I still need to figure out why the DLNA database is empty after the Pi is rebooted)

AirPrint

This was a nice-to-have. I have a basic Brother DCP-1610 Laser printer, which does have WiFi printing on it – so I thought it would be easy to print stuff from my iPhone. I should be so lucky – instead, you have to install Brother’s own printing app on your phone, and use that to print, which isn’t very easy.

However, (as per this guide) by installing CUPS on the Pi, and adding the Brother printer to that, I can now AirPrint to the Pi and it prints on the Brother. Easy!

Screenshot of printing from an iPhone

Backing up my family photos

I don’t use Apple’s iCloud or Google photos, my photos workflow is very manual and old school. I don’t want to be tied to any Photo manager software or database, e.g. Apple Photos, so I still organize photos into folders.

  1. Move photos from iPhone via USB to Mac, using Image Capture
  2. On Mac, use Preview app to delete the bad / duplicate photos
  3. Rename and move to a folder based on the year and location, i.e. 2023/04 Warsaw/

I also do the same for home videos. For those I’ll occasionally edit them into something more presentable using iMovie, or Quicktime Player to trim the start and end.

I use rsync over ssh to copy these folders to from my Mac to the Pi’s DLNA folder, following the instructions here.

Time Machine

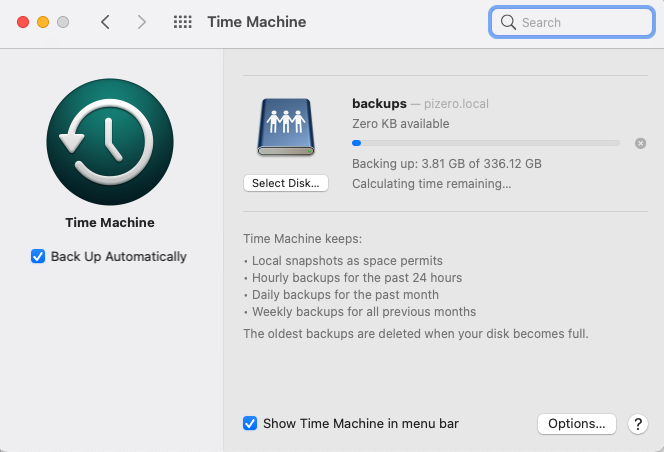
As already mentioned, since my replacement router doesn’t support Time Machine (which is Apple’s backup software), it’s easy enough to add Time Machine to the Pi Zero by following these instructions.

I’ve gotten it to work just now, but I’m not sure it’s a good idea, because the Pi Zero doesn’t have ethernet, only has 2.4Ghz WiFi, and only has a USB 2.0 connection to the HDD – so there’s a lot of bottlenecks there. I might be better off with a Raspberry Pi 5 with Ethernet and USB 3.0.

Screenshot of Apple Time machine, showing 3Gb out of 330Gb backed up.SSH

Since this is headless, to connect to it I use ssh, i.e. ssh pizero. To save me entering the password every time, I did

ssh-keygen  (this generates an rsa key, only need to do this once on my Mac)

ssh-copy-id pizero

Spin down external HDD

apt-get install hd-idle and then follow the instructions here to configure it to start at startup. Note: I never actually got this to work.

Update: February 2024

Well, after only 3 months the Pi Zero has stopped working. When I put the SD card into my Macbook, it thinks the SD card is write-protected for some reason. Looks like I need a new SD card. I’m not sure I’m going to bother. Of the above apps:

  • Pi-Hole. Not really needed, Safari on my iPhone has decent enough content blockers now, and it’s handy being able to quickly disable them when a site asks you to.
  • UPnP / DLNA. Streaming 4K home videos to our LG TV in the lounge would stutter, which was frustrating. Not sure where the bottleneck here is – could be network (Pi Zero only has 2.4Ghz WiFi, no ethernet) or CPU. Reverted to plugging in a USB HDD to the TV.
  • AirPrint – I’ll miss this
  • Time Machine – was too slow to backup over WiFi, and I don’t trust that a restore would have worked. Reverted to using an external USB HDD to do Time Machine backups.

OnePlus 2 = poo

I’ve been a long time iPhone user, first with a 3GS in 2009 and then an iPhone 5 in 2012. So at 3+ years old my iPhone 5 was getting a bit long in tooth. My colleague Nick recently replaced his iPhone 5 with a OnePlus 2 and he was very happy with it. Envious of that big screen and also it’s relatively cheap price, I decided to give it a go. I also wanted to try out Android as I’d heard good things.

DSC04123.0

I wasn’t impressed.

On the phone hardware side: The ringtone was quiet and the vibration unnoticeable when in a pocket. I managed to cause it to crash a few times by accidentally hammering the back button. It would get hot. And battery life wasn’t amazing.

On the Android side: I didn’t like Android’s way of doing notifications. Some web pages would run really slowly, and I don’t tolerate lag in a brand new phone.

As for that big screen – well, the apps didn’t feel optimized it – e.g. Facebook would still only show one news story at a time. Even with the smallest font there wouldn’t be much text on the screen at once, just lots of white space and big buttons. So the big screen felt wasted.

After 5 days I gave up on it and decided to go back to my iPhone 5, so I attempted to return the OnePlus. And that’s where their pathetic support team got involved. I started the returns process on Feb 16, and so far I’ve had 12 messages back and forward confirming my address, and confirming whether or not I want to return the cover, over and over. Finally today, March 11, I received an RMA form. So it’s taken almost a month of backwards and forwards with “Joey” and “Alex”. Let’s see how long it takes to get the money into my account.

Update: it took another month for the RMA to be processed, and I hadn’t heard anything until I chased them, so in total it took 2 months (and 18 emails) just to return the phone and get a refund.

Upgrading a Haswell Macbook Air (mid-2013) to Windows 8

I recently bought a new Macbook Air for work – a mid-2013 Haswell one. I got all the optional upgrades which means it’s an i7, 8Gb of RAM and 512Gb SSD. The main reason I upgraded from my mid-2011 Macbook Air was that I wanted more RAM – with 4Gb it was struggling to run Azure VMs in Windows. Also the 256Gb SSD was stretched, I was constantly having to fight to free up disk space in both Windows and OSX. Finally, I wanted USB 3.0, so that I could use an external HDD at full speed should I need more disk space. And the new PCI-based SSD sounded tasty.

macbook air

My Windows 8 Pro license is an upgrade only license, so in order to get Windows 8 on it I first had to install Windows 7 using Boot Camp. Which went fine.

Once Windows 7 was installed I ran the Windows 8 upgrade installation. It would go through the whole process but then after a few reboots and at the end of the setup process it would hang at the “Personalise” screen, where you choose a colour scheme and a name for your computer. It wasn’t actually hung, it was just that the keyboard and mouse didn’t work so I couldn’t click next. Neither the built in keyboard nor a USB keyboard would work.

So then I tried downloading and making a Windows 8 ISO and installing from that via Boot Camp (instead of installing Win 7 first), which worked fine, but then when I Activated Windows it wouldn’t let me because I have an upgrade only Windows 8 license. Poo.

So my third attempt, and this time I installed Windows 7 first, and the Boot Camp drivers in Windows 7. Then when I ran the Windows 8 upgrade install I elected to choose to Keep Windows settings, personal files and applications – the idea being that it would keep the Boot Camp drivers installed.

choose

Well, third time lucky anyway cos that worked.

Update: it looks like this is a known issue – see this solution.

So, how does the new Macbook perform compared to my older mid-2011 Macbook Air?

Here’s 2011’s Windows Experience Index:

wei

And here’s 2013’s. Not really much faster!
win 7 experience

Finally, here’s 2013’s again under Windows 8:win 8 experience

The only thing worth noting is the decent hard disk rating.

Another advantage of the Haswell chipset is longer battery life – up to 12 hours according to Apple, and the reviews seem to confirm that. BUT I bought the i7 version which is a bit more of a power hog, as confirmed by AnandTech – so I only get about 6 hours of battery life, a slight improvement on the 4 hours I was getting on the 2011 i7 version.

So overall, the 2013 Air is not much of an upgrade on the 2011 version really. Which is a bit of a disappointment.

iTunes sucks balls

Every time I use iTunes, I hate it. And now I have yet another reason to hate it:

itunes upgrade required

Oh fuck off, I don’t believe you. I’m running 10.2.2 and you’re telling me that I need to upgrade to the latest version just to stream a video? Bullshit. You’re making me upgrade because you think you can make me upgrade. Well fuck you, I’m not going to, so I won’t bother watching the iTunes Festival performances either.

Organise your digital life – Part 1 Photos

I got my first digital camera in 1998. It was a low-end Kodak model but it was still quite expensive, around US$200, and it took photos at a whopping 493×373 resolution. I think it held about 20 photos in it’s internal memory. It didn’t even have a flash!

Back then I didn’t have much of a strategy for organising my digital photos – and the photos were so crap I didn’t use it all that often anyway:

My student workspace in 1998, taken on my 1998 era Kodak digital camera. Spray-painted keyboard and spray-painted big-ass server case, oh yeah. Looks like the 14″ monitor is running Winamp.

My next digital camera was in 2003 – a Pentax Optio S, the original “Altoids tin” camera. This camera served me well and I still have it lying around somewhere. Alas the flimsy battery compartment lid broke off but other than that it still works.

Pentax Optio S

Anyway, about 2004 I realised I needed a strategy for organising all of my photos, and the strategy I chose and which have stuck to is this.

Under My Pictures I have a Camera folder. In the Camera folder is a folder for each year:

Each year is divided up into sub-folders named after the locations where I have taken photos.

The naming format of each subfolder is “## – Place name”. E.g. in 2010 the first place I took photos was at my friend Kelvin’s wedding in New Plymouth so that is the first folder listed.

It’s really quite straightforward (and I think worthwhile) to organise your photos into folders based on year and location.

Finally, at the photos level is where I get a bit more pedantic (and it’s probably not necessary).

I usually rename my folders “Event – ##” or if the photo contains people then “Event – ## – Person Name”. I use a tool for renaming the photos in this way (an old version of ACDSee that came bundled with my Pentax camera in 2003) but I still need to manually add my friend’s names to the filename.

And that’s it. I know that most people aren’t going to bother to rename each photo the way I do (fair enough), but I think it’s not much effort to organise your photos into folders by year and location. And for god’s sake, delete your crap photos. I am notoriously economical with photos, i.e. I might take 10 or 20 shots of a landmark but I’ll only keep 1 or 2 of them.

Change your country with iTunes iStore and iPhone App Store

A few months ago I moved from NZ to London. For a while I kept using my NZ account on iTunes and on my iPhone to buy apps, but eventually I needed to start using the UK app store.

The only info I could find on google was how to change your country in iTunes. That’s easy enough, using the country selector at the bottom of the screen. So now I can browse the UK iTunes store, and everything appears in £. But when I’d try and sign in to buy something, I’d get an error message “Your account is only valid for purchases in the NZ iStore” and I’d get redirected to the NZ iStore. I couldn’t find much help online, and was about to sign up for a whole new UK-based iTunes account with another email address, until I found this help page:

Changing your iTunes Store country:

Sign in to the account for the iTunes Store region you’d like to use. If already signed in to an account, from Settings, choose Store and then View Account.

Tap “Change Country of Region” and follow the on screen process of changing your region. Agree to the terms and conditions for the region if necessary, and then change your billing information.

Once that was done, I could see and use the UK iTunes on my Mac. But when I would surf the App Store on my iPhone I was still seeing the NZ app store. The fix is to just download any free app. Once it starts downloading it, it realises you’ve signed up to use a new country’s App Store and redirects you there. Or, on the iPhone go into Settings -> iTunes & App Stores -> Apple ID, and then Sign Out. When you Sign in again you’ll be redirected to the new country’s App Store.

A final tip: if you decide you don’t want to change your country and you need to buy US iTunes vouchers from overseas, TunesBud can hook you up.

First hands on with an Amazon Kindle 3

For Christmas 2010, and on a whim, I bought myself the 3G model of the Kindle 3. It finally arrived this morning, so it’s a late Christmas present.

I guess I’m a bit late getting one of these since they’ve been out for a while. The thing is, I normally try not to buy books. Don’t get me wrong, I’m always reading something, but usually it’s books that friends have lent me (hi Trent). I don’t like accumulating books because I’m always moving house (or country) and books are another thing to lag around. Right now I have a shelf of books at my parent’s house that has been sitting there for more than 5 years.

Lately I’ve been buying programming books though and those are usually very large and heavy. I left my copy of Code Complete 2 in NZ and I would have like to have brought it with me.

I’ve also been reading books on my iPhone through iBooks. So far only free classics, like Sherlock Holmes etc. Programming books in PDF format are too small for the iPhone.

I’d also been reading PDF ebooks on my netbook, by rotating the PDFs counter-clockwise in Acrobat reader, and then physically turning my netbook on its side. Very lo-tech. I’ve only been doing this at home though!

So iBooks on the iPhone and PDFs on the netbook were beginning to convince me that ebooks are the way forward. So I took the plunge with the Kindle.

IMG_2304 (Small)

Above: my 3 generations of ebook reader – netbook, Kindle 3 and iPhone.

File Formats

Kindle supports Amazon’s DRM native Kindle file format, .AZW. Yuck, I didn’t realise it was DRM until now. The good thing about reading .AZW ebooks (i.e. those you buy Amazon.com) is that you can choose the font size, line spacing etc. This means that .AZW files don’t really have page numbers, because depending on your zoom level and your line spacing settings a book could have more or less pages. Instead, each paragraph has a position number, and the little progress bar tells you how far through the book you are. Academics and students are up in arms over the lack of page numbers, because it means they can’t easily use ebooks in citations for academic writing.

PDF

Another format it supports is PDF files. This was important to me as mentioned earlier, because I have PDFs of a number of programming books that I wanted to try to read on the Kindle.

When viewing PDFs on the Kindle, the page numbers of the PDF are respected. But the downside of that is you can’t set your own font size and line spacing. The Kindle 3 is pretty small, about the size of a DVD cover. In fact I can fit the Kindle inside a DVD cover, which could make for an interesting and cheap carry case. And with all that bezel and the keyboard, the screen itself is even smaller. So when you view a PDF on that small screen in portrait mode the font size is really tiny. If you zoom in to make it more readable then you’ll have to constantly horizontal scroll which isn’t practical. A workaround is to put the Kindle into landscape mode, then the text is more readable and you only have to vertically scroll once to read a page.

IMG_2292 (Small)

Above: A bit too small to read comfortably…

IMG_2295 (Small)

Above: But in landscape mode it’s OK.

I only got the thing today so haven’t put any long hours in reading PDFs on it but I’ll update this post in a few weeks once I have.

Packaging

Kudos to Amazon for their “Certified Frustration Free” packaging. Pull one tab and the recyclable box opens, and there it is. No more “wrap rage”:

Worth it?

Now that I think about it, if ever there was a genre of books that quickly goes out of date, it’s programming books. So perhaps I shouldn’t have bought the Kindle for reading programming books on and instead just bought the books I want to read and then just leave them behind whenever I move house!

But I think it’ll still be worth it for buying and storing non-programming books with. Now I can build up my (ebook) library without worrying about accumulating luggage.

Update

Well it’s been a couple of weeks now, and as far as studying programming books cover to cover it works fine. But in terms of replacing the stack of programming reference books on my desk, it’s a no go. It takes too long to find anything.

IE9 Beta renders blurry text

I’m just giving Internet Explorer 9 Beta a try, and my first impression is that the text in web pages looks blurry. See:

That’s the same web page viewed in 3 different browsers. Which one looks the worst to you?

Top – IE9

Middle – Chrome

Bottom – Firefox.

I also tried to create this post using wordpress.com’s post editor in IE9, but it didn’t work – I couldn’t change the cursor position using my mouse, and the image upload dialog box wouldn’t appear. Which is ironic since Microsoft is touting WordPress’s IE9 enhancements.

Update: Scott Hanselman has explained the IE9 blurry text issue.

A world with free mobile calls

I haven’t posted here for a while because I just went on a month long holiday in India, which was quite an experience.

One interesting thing about India was that cellphones are everywhere and the calls are cheap. Like, real cheap. The standard rate is about 1 rupee (USD $0.02) per minute. But if you’re calling someone on the same mobile network as you, then calls are half a rupee (USD $0.01) per minute. This is cheap even for Indians – you can’t buy anything for 1 rupee in India. So it’s practically free to make a quick one minute call.

Interestingly, to send a text message is about the same price – 1 rupee. Suffice to say no one ever texts in India, since it’s quicker and easier to make a call.

So, what do you expect would happen in a world with practically free communication? Spam of course. People who’d been in India a while ignored their text messages, because the only people who ever send texts are companies spamming. Likewise, it was all too common to get calls from unknown numbers which would be a recorded advertisement.

Apparently you can request your number be added to a “do not call” list and it actually works.