If you’d like to generate request and response examples for your APIs, you no longer need to use my Swashbuckle.AspNetCore.Filters package.
Since May 2018, Swashbuckle.AspNetCore supports adding examples via XML comments.
For installation instructions, see the instructions in Swashbuckle.AspNetCore’s readme.
Request examples – POST
[ApiController]
[Route("[controller]")]
public class WeatherForecastController : ControllerBase
{
    [HttpPost]
    public void Submit(WeatherForecast forecast)
    {
        // blah
    }
}

public class WeatherForecast
{
    /// <summary>
    /// The date of the forecast in ISO-whatever format
    /// </summary>
    public DateTime Date { get; set; }

    /// <summary>
    /// Temperature in celcius
    /// </summary>
    /// <example>25</example>
    public int TemperatureC { get; set; }

    public int TemperatureF => 32 + (int)(TemperatureC / 0.5556);

    /// <summary>
    /// A textual summary
    /// </summary>
    /// <example>Cloudy with a chance of rain</example>
    public string Summary { get; set; }
}
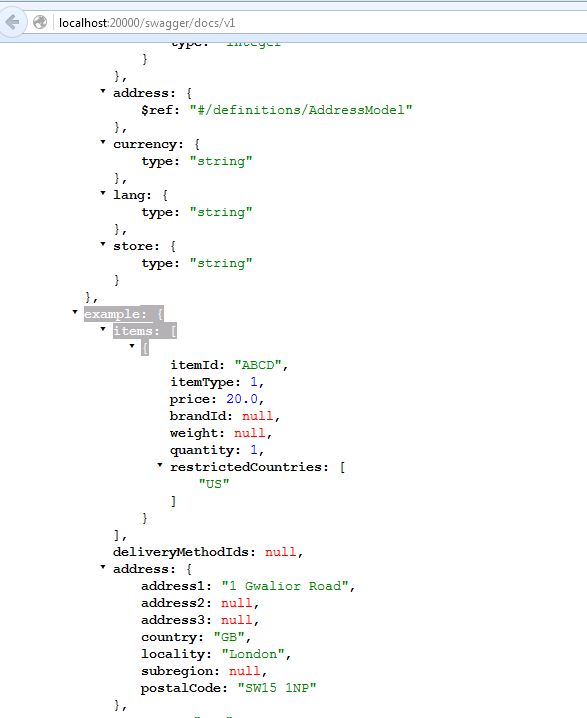
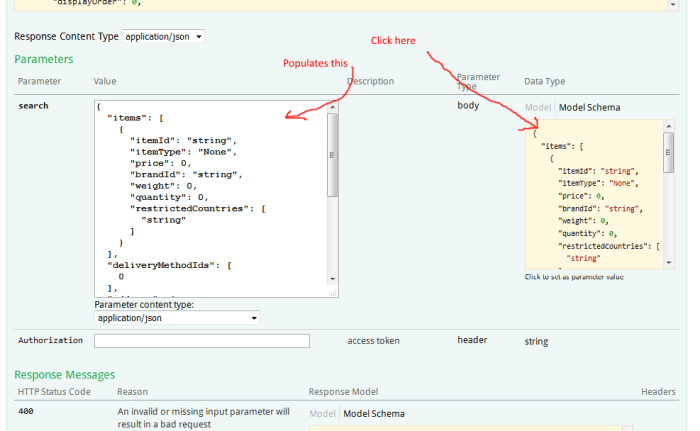
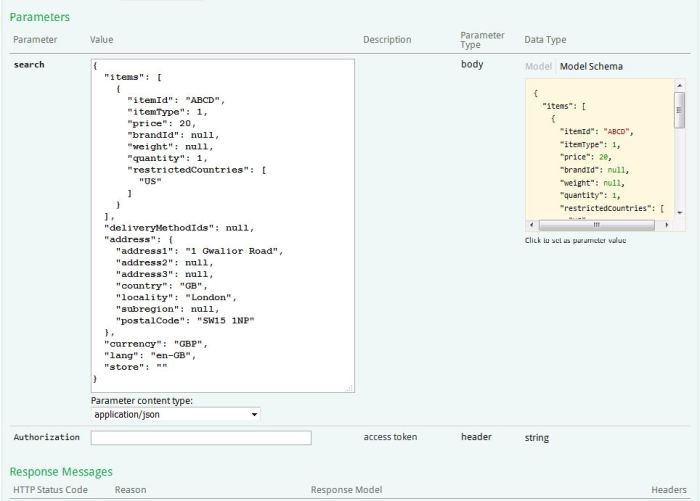
Results in:

Request examples – GET
OpenApi 3.0 supports examples on querystring parameters, which is pretty handy. Just add example= to the param:
/// <summary>
/// Retrieves a specific product by unique id
/// </summary>
/// <param name="id" example="123">The product id</param>
[HttpGet("{id}")]
public Product GetById(int id)
Courtesy of my pull request :-)
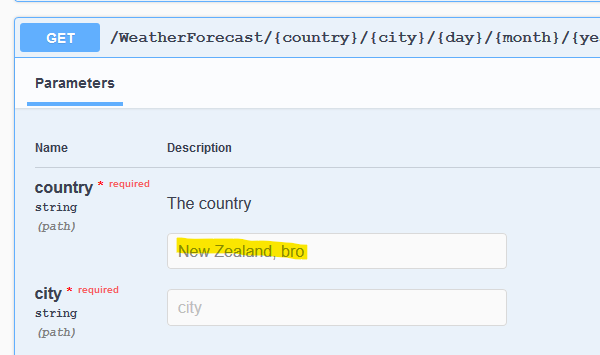
Or if you’ve got a reference type in your request (who would do that?), it still works:
// e.g. https://localhost:5001/weatherforecast/AU/MEL/1/2/2020
[HttpGet]
[Route("{country}/{city}/{day}/{month}/{year}")]
public string Get([FromRoute]WeatherRequest wr)
{
    // blah
}

public class WeatherRequest {
    /// <summary>
    /// The 2 digit country code
    /// </summary>
    /// <example>New Zealand, bro</example>
    public string Country { get; set;}
    public string City { get; set; }
    public int Day { get; set; }
    public int Month { get; set; }
    public int Year { get; set; }
}
Response examples
Response examples, again just add XML comments to your response class, and [ProducesResponseType]
[HttpGet]
[ProducesResponseType(typeof(WeatherForecast), StatusCodes.Status200OK)]
public WeatherForecast Get()
{
    // blah
}

// see WeatherForecast at the top of this post

Again, for installation instructions, see the instructions in Swashbuckle.AspNetCore’s readme.