Book review – Instant Meteor Javascript Framework Starter

Last year I started playing around with Meteor, a new javascript framework. I didn’t get much further than playing with and tweaking sample applications.

When it came time to start creating my own app in Meteor though, I was a bit lost. I didn’t really know where to start.

I was given a copy of Instant Meteor Javascript Framework Starter which I read over the weekend. The book was a good read – I especially enjoyed the opening chapters which covered what Meteor is and why it’s cool, better than the official Meteor docs cover.

It covered all the Meteor basics well, and I would recommend the book to anyone who wants to get started building their own app with Meteor. Reading it has gotten me excited about Meteor again!

Meteor todos sample – add buttons to move items up and down

This is the sixth in a x part series about Meteor for beginners.

Let’s add the buttons to the UI first. I’ve decided to put them next to the delete button, so I will copy the html and css for the “destroy” class so that the UI is consistant.

<template name="todo_item">
  <li class="todo {{done_class}}">
    {{#if editing}}
      <div class="edit">
        <input id="todo-input" type="text" value="{{text}}" />
      </div>
    {{else}}
      <div class="move-up"></div>
      <div class="move-down"></div>
      <div class="destroy"></div>
      ...
#item-list .todo .destroy {
    cursor: pointer;
    position: absolute;
    margin-left: 50px;
    left: 5px;
    top: 15px;
    height: 20px;
    width: 20px;
}

#item-list .todo .move-up {
    cursor: pointer;
    position: absolute;
    left: 5px;
    top: 15px;
    height: 20px;
    width: 20px;
}

#item-list .todo .move-down {
    cursor: pointer;
    position: absolute;
    margin-left: 25px;
    left: 5px;
    top: 15px;
    height: 20px;
    width: 20px;
}

#item-list .todo .display, #item-list .todo .edit {
    margin-left: 80px;
    height: 100%;
    width: auto;
    float: left;
    padding-top: 18px;
    line-height: 1;
}

#item-list .todo:hover .move-up {
    background: url('/arrowup.png') no-repeat 0 0;
}

#item-list .todo .move-up:hover {
    background-position: 0 -20px;
}

#item-list .todo:hover .move-down {
    background: url('/arrowdown.png') no-repeat 0 0;
}

#item-list .todo .move-down:hover {
    background-position: 0 -20px;
}

PS. I spent longer making the up down arrow icons in an image editor than writing the code for this post!

Items in each todo list are currently sorted by their timestamp:

Template.todos.todos = function () {

  ...

  return Todos.find(sel, {sort: {timestamp: 1}});
};

I will continue to use the timestamp to control the sort order. When the up button is clicked, set the current item’s timestamp to be 1ms less than the item above it.

Template.todo_item.events = {
  ...

  'click .move-up': function() {
    var todos = Template.todos.todos().fetch();
    var currentItemIndex = todoRanking(this, todos);

    if (currentItemIndex > 0) {
      var todoAboveMe = todos[currentItemIndex - 1];
      Todos.update(this._id, {$set: {timestamp: todoAboveMe.timestamp - 1}});
    }
  }
var todoRanking = function(todoItem, todoArray) {
  var ids = todoArray.map(function (todo) { return todo._id; });
  return ids.indexOf(todoItem._id);
};

We can do something similar to move an item down.

  'click .move-down': function() {
    var todos = Template.todos.todos().fetch();
    var currentItemIndex = todoRanking(this, todos);

    if (currentItemIndex < todos.length -1) {
      var todoBelowMe = todos[currentItemIndex + 1];
      Todos.update(this._id, {$set: {timestamp: todoBelowMe.timestamp + 1}});
    }
  }

See the code on github.

Meteor todos sample – remove all items

This is the fifth in a x part series about Meteor for beginners.

Exercise 2: Add a Remove all items button

As usual, let’s add the button to the html first. I’m gonna stick it in the top frame next to the list of tags cos I can’t think of anywhere better to put it.

<template name="tag_filter">
  <div id="tag-filter" class="tag-list">
    <div class="label">Show:</div>
    {{#each tags}}
      <div class="tag {{selected}}">
        {{tag_text}} <span class="count">({{count}})</span>
      </div>
    {{/each}}
    <div class="label">
        <input type="button" class="clear-items" value="Clear all items" />
    </div>
  </div>
</template>

And now the code to handle the button click event:


Template.tag_filter.events = {
  'mousedown .tag': function () {
    if (Session.equals('tag_filter', this.tag))
      Session.set('tag_filter', null);
    else
      Session.set('tag_filter', this.tag);
  },
  'click .clear-items': function() {
    if (confirm('Are you sure you want to remove all todo items from the current list? This action cannot be undone.')) {
      var list_id = Session.get('list_id');
      if (!list_id)
        return;

      Todos.remove({list_id: list_id});
    }
  }
};

Easy!

See the code on github.

Meteor todos sample – friendly URLs

This is the fourth in a x part series about Meteor for beginners.

Introduction

I’ve been trying to get up to speed with Meteor lately. Since I don’t have any experience with nodejs it’s been a challenge.

I started by looking at the leaderboard sample, and then the todos sample. At the end of the video the author lays down a challenge – to make the URLs friendly. So instead of http://localhost:3000/bbbeec7c-6749-400b-bc45-4ed744e010b7 it should be http://localhost:3000/Languages. In order to do that I needed to understand how routing works.

When you click on a todo list in the left, this code fires:

Template.lists.events = {
  'mousedown .list': function (evt) { // select list
    Router.setList(this._id);
  },

which calls:

var TodosRouter = Backbone.Router.extend({
  routes: {
    ":list_id": "main"
  },
  main: function (list_id) {
    Session.set("list_id", list_id);
    Session.set("tag_filter", null);
  },
  setList: function (list_id) {
    this.navigate(list_id, true);
  }
});

The setList function calls navigate, which is Backbone.js’s router function to save the current location in the browser’s history. The “true” parameter also tells the browser to navigate to the url, so if list_id = “1234” the browser will navigate to i.e. localhost:3000/1234.

According to the routes defined here

var TodosRouter = Backbone.Router.extend({
  routes: {
    ":list_id": "main"
  },

if I navigate to localhost:3000/1234, then “1234” will be passed to the “main” function as the “list_id” parameter. Which takes us to:

var TodosRouter = Backbone.Router.extend({
  routes: {
    ":list_id": "main"
  },
  main: function (list_id) {
    Session.set("list_id", list_id);
    Session.set("tag_filter", null);
  },
  setList: function (list_id) {
    this.navigate(list_id, true);
  }
});

OK, so the only thing that the “main” function does is set two Session variables. What effect does that have? Time to look at some html.

client/todos.html:

<template name="todos">
  {{#if any_list_selected}}
  <div id="items-view">
    <div id="new-todo-box">
      <input type="text" id="new-todo" placeholder="New item" />
    </div>
    <ul id="item-list">
      {{#each todos}}
        {{> todo_item}}
      {{/each}}
    </ul>
  </div>
  {{/if}}
</template>

That there is a Handlebars template, with name=”todos”. Interestingly, it has a “#each todos”. The data for that is retrieved by a helper function called “todos” (on the Template also called “todos”), i.e. this:

Template.todos.todos = function () {
  // Determine which todos to display in main pane,
  // selected based on list_id and tag_filter.

  var list_id = Session.get('list_id');
  if (!list_id)
    return {};

  var sel = {list_id: list_id};
  var tag_filter = Session.get('tag_filter');
  if (tag_filter)
    sel.tags = tag_filter;

  return Todos.find(sel, {sort: {timestamp: 1}});
};

This template (like all Meteor templates) reactively monitors the Session and detects that the value for Session.get(‘list_id’) has changed, so it runs again and returns the todo items to be rendered. Each todo item is then rendered by another Handlebars template called todo_item , as per the {{> todo_item}} in the html.

In summary then,

  1. Todo list link is clicked in the left pane, calls TodosRouter.setList(list_id).
  2. TodosRouter.setList navigates to ~/list_id
  3. Router.main sets Session[list_id] variable.
  4. The template helper “todos” detects Session[list_id] has changed so it re-runs.
  5. The Handlebars template named “todos” is re-rendered with the result of the “todos” template helper.

So how do we make the URLs friendly?

Now that we understand how routing works in Meteor, we can take the TodosRouter shown above and change:

  1. TodosRouter.setList(list_id) to TodosRouter.setList(list_name)
  2. TodosRouter.setList should navigate to ~/list_name
  3. Router.main can lookup the correct list_id from the list_name and set the Session[list_id] as before.

So

var TodosRouter = Backbone.Router.extend({
  routes: {
    ":list_name": "main"
  },
  main: function (list_name) {
    var list = Lists.findOne({name: list_name});
    if (list)
      Session.set("list_id", list._id);
    Session.set("tag_filter", null);
  },
  setList: function (list_name) {
    this.navigate(list_name, true);
  }
});

We also need to change all the code which calls setList():

Template.lists.events = {
  'mousedown .list': function (evt) { // select list
    Router.setList(this.name);
  },
Meteor.subscribe('lists', function () {
  if (!Session.get('list_id')) {
    var list = Lists.findOne({}, {sort: {name: 1}});
    if (list)
      Router.setList(list.name);
  }
});
Template.lists.events[ okcancel_events('#new-list') ] =
  make_okcancel_handler({
    ok: function (text, evt) {
      var id = Lists.insert({name: text});
      Router.setList(text);

Finally, for cosmetic reasons, we should change the “lists” template so that the html that’s rendered for the todo list links has the correct href attribute – so that when the user hovers over the link they see the new friendly url.

<a class="list-name {{name_class}}" href="/{{name}}">
  {{name}}
</a>


See the source code on github.

Meteor leaderboard sample exercise three

This is the third in a x part series about Meteor for beginners.

Exercise 3a: Remove a scientist from the leaderboard

This should be easy. First, let’s add a button.

<template name="leaderboard">
  
  ...

  {{#if selected_name}}
  <div class="details">
    <div class="name">{{selected_name}}</div>
    <input type="button" class="inc" value="Give 5 points" />
    <input type="button" class="delete" value="Delete" />
  </div>
  {{/if}}

  ...
</template>

And now the event to fire when the button is clicked:

  Template.leaderboard.events = {
    
    ...

    'click input.delete': function() {
      if (confirm('Are you sure you want to delete the player?')) {
        Players.remove(Session.get("selected_player"));
      }
    }

N.B. the remove() function accepts either a selector i.e. Players.remove({_id: Session.get(“selected_player”)}), or a string (which is the _id) as its first argument.

Exercise 3b: Add a new scientist to the leaderboard

Let’s add a new “addPlayer” template to the html:

<template name="addPlayer">
    <div>
        <div>Add a new player:</div>
        <span class="name">Name:</span>
        <input type="text" id="playerName" />
        <span class="score">Score:</span>
        <input type="text" id="playerScore" />
        <input type="button" class="add" value="Add player" />
    </div>
</template>

And now render it after the leaderboard template:

<body>
  <div id="outer">
    {{> leaderboard}}
    {{> addPlayer}}
  </div>
</body>

And now lets add template event code which will fire when the “Add player” button is clicked:


  Template.player.events = {
    'click': function () {
      Session.set("selected_player", this._id);
    }
  };

  Template.addPlayer.events = {
    'click input.add': function () {
      // todo - add validation
      Players.insert({name: playerName.value, score: Number(playerScore.value)});
    }
  };
}

Browse the code on Github.

Meteor leaderboard sample exercise two

This is the second in a x part series about Meteor for beginners.

Exercise 2: Add a button to randomise all players scores

First, let’s add the button to the bottom of the leaderboard template.
leaderboard.html:

<template name="leaderboard">

  ...

  <div>
      <input type="button" class="randomise" value="Randomise" />
  </div>
</template>

The meteor sample already has a formula to generate a random score which is called on startup if the database is empty. So let’s refactor that into a function so that we can reuse it.

//
var randomScore = function() {
  return Math.floor(Math.random()*10)*5;
}

// On server startup, create some players if the database is empty.
if (Meteor.is_server) {
  Meteor.startup(function () {
    if (Players.find().count() === 0) {
      var names = ["Ada Lovelace",
                   "Grace Hopper",
                   "Marie Curie",
                   "Carl Friedrich Gauss",
                   "Nikola Tesla",
                   "Claude Shannon"];
      for (var i = 0; i < names.length; i++)
        Players.insert({name: names[i], score: randomScore()});
    }
  });
}

Now all we need to do is add an event to handle the button click which will do the work:

  Template.leaderboard.events = {

    ...

    'click input.randomise': function() {
      Players.find({}).forEach(function(player) {
        Players.update(player, {$set: {score: randomScore()}});
      });
    }
  };

Browse the code at github.

Meteor leaderboard sample exercise one

This is the first in a x part series about Meteor for beginners.

Introduction

I’ve been trying to get up to speed with Meteor lately. Since I don’t have any experience with nodejs it’s been a challenge. However, Meteor’s documentation is very good so I’m getting there.

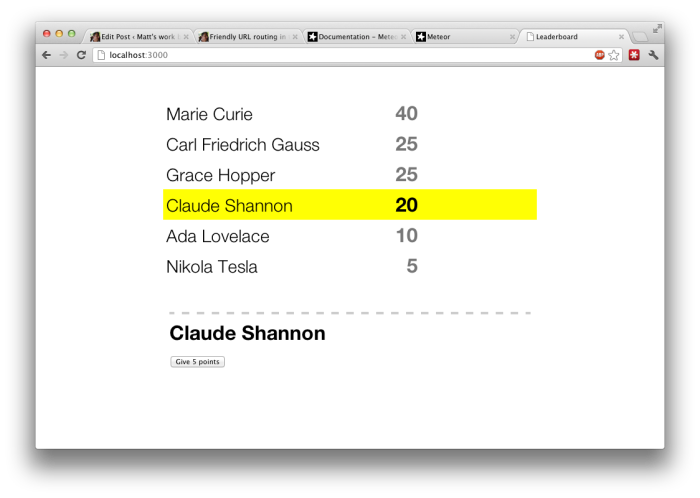
I started by looking at the leaderboard sample.

The tutorial suggests making 3 enhancements to the leaderboard sample as an exercise. Here’s my attempt at the first one.

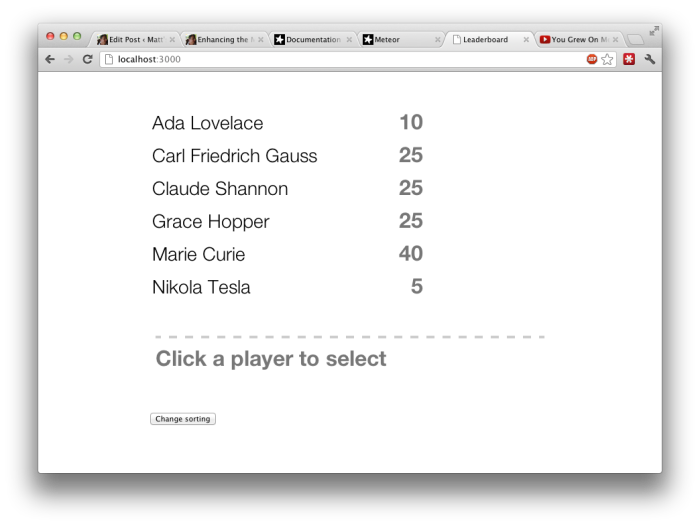
Exercise 1: Add a button to toggle between sorting by score and by name

First let’s add a button to the bottom of the “leaderboard” template

<template name="leaderboard">
  <div class="leaderboard">
    {{#each players}}
      {{> player}}
    {{/each}}
  </div>

  {{#if selected_name}}
  <div class="details">
    <div class="name">{{selected_name}}</div>
    <input type="button" class="inc" value="Give 5 points" />
  </div>
  {{/if}}

  {{#unless selected_name}}
  <div class="none">Click a player to select</div>
  {{/unless}}

  <div>
      <input type="button" class="sort" value="Change sorting" />
  </div>
</template>

That there is a Handlebars template with name=”leaderboard”. Notice that it has a {{#each players}}. We’ll get to that in a minute.
Now let’s add javascript to toggle the sort order. We’ll need to save the sort order in the Session, so let’s set its default value at startup.

if (Meteor.is_client) {
  Meteor.startup(function() {
    Session.set("sort_order", {score: -1, name: 1});
  });

{score: -1, name: 1} means sort by score (descending) first, then name.
The {{#each players}} I mentioned earlier calls the Template.leaderboard.players() function, so let’s change that to use the sort order stored in the Session.

  Template.leaderboard.players = function () {
    return Players.find({}, {sort: Session.get("sort_order")});
  };

Now all we need to do is change the sort order stored in the Session whenever the button is clicked. So let’s add an event to the Template.leaderboard.events object which is fired when the “Change sorting” button is clicked.

  Template.leaderboard.events = {
    'click input.inc': function () {
      Players.update(Session.get("selected_player"), {$inc: {score: 5}});
    },
    'click input.sort': function() {
      var sortOrder = Session.get("sort_order");

      if (Object.keys(sortOrder)[0] == "score") { // sort by score desc
        Session.set("sort_order", { name: 1, score: -1 }); // sort by name
      }
      else {
        Session.set("sort_order", { score: -1, name: 1 }); // sort by score desc
      }
    }
  };

See the code on github.